By Eric Bach and Travis Pollen

While reducing complex topics down to usable pieces is important to make the science of training applicable, we can’t just blindly attach ourselves to absolutes. In no situation is this more obvious than the epidemic rates of knee, shoulder, and back pain in avid lifters.
Whether it’s a bad back, a balky shoulder, or a bum ankle, just about everybody is screwed up in one way or another. It’s for this very reason that those cookie-cutter programs don’t, well, cut it. We’re all unique, with anatomical differences and injury histories that require a truly individualized approach to training.
In this two-part series, our goal is to provide just that, by presenting workarounds to common injury sites. In Part I, we looked at five upper body injury sites, pain-provoking exercises, and clever workarounds.
In case you missed Part I - The Upper Body, click here:
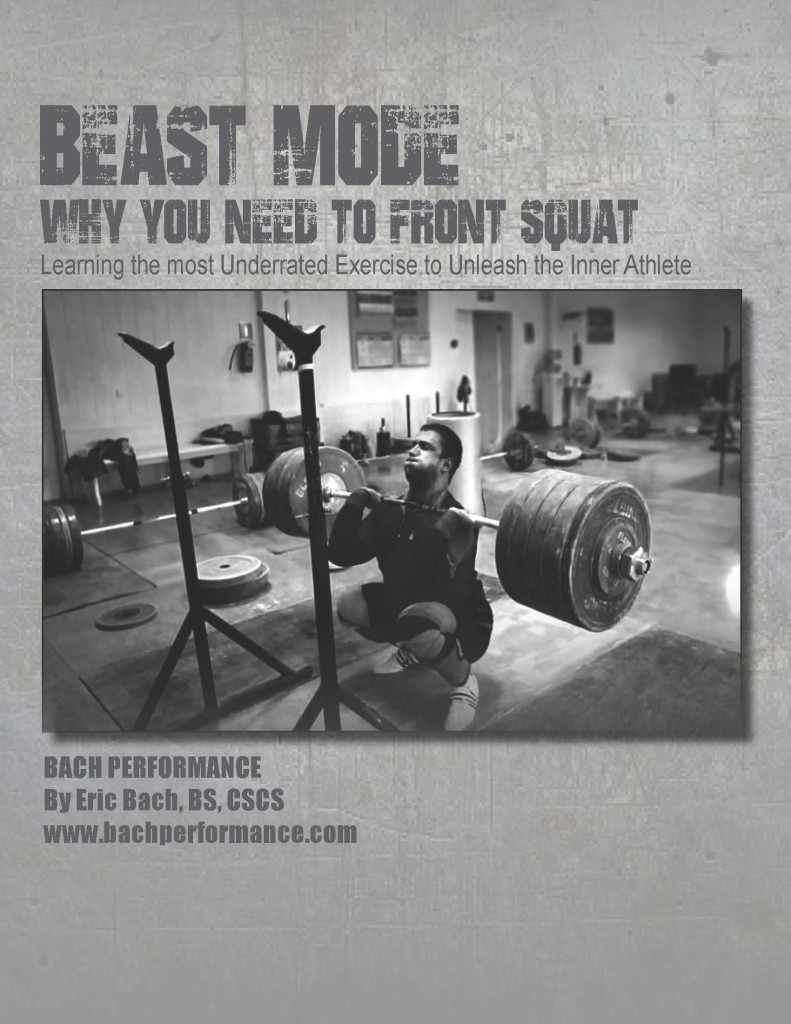
Before we get to Part II, Eric recently re-released two FREE e-books (available HERE): The Beginner's Guide to High Performance Lifting and Beast Mode: Why You Need to Front Squat. These e-book are designed to help you discover the best way to train for your ultimate high-performance body, enabling you look, feel, and perform like an athlete. Pick them up now!
Okay, let’s delve into Part II - The Lower Body, shall we?
Color code:
Eric = Blue
Travis = Red
- Site of pain: Low back
Provocative: Back squat
Replace with: Front squat
Tell me if this sounds familiar: You were feeling great during a workout. Technique was on point, you were powerful, and all your sets were easy. “What the hell, let’s go for a PR,” you say to yourself.
You lower the weight under control, but as soon as you reverse the motion to stand up, your hips shoot back and you bend forward, turning your squat into an ugly good morning. It’s happened again: sharp pain shoots up your back, and you’re left gimping around for the next six weeks.
I’ve seen this hundreds of times, and for that reason, I rarely have clients back squat.
Instead, I opt for the front squat. Anterior bar placement forces lifters to attain an upright posture, decreasing shear stress on the spine and significantly reducing injury risk.
In fact, I don’t think I’ve ever seen an injury on the front squat.
When in doubt, opt for the front squat. The anterior bar position stimulates greater oblique and rectus abdominus involvement, strengthening your core and preventing flexion based back injuries when squatting.
Provocative: Conventional barbell deadlift
Replace with: Rack pull or block pull
Not everyone can or should pull a conventional deadlift from the floor. Whether they have tight hips, short arms, or a bad back, there are plenty of reasons why not to conventional deadlift. It’s far too easy to get into a bad position at the start, let the bar drift away from the body, and wind up in back pain for the rest of the week (or lifetime, or multiple lifetimes if you’re actually a cat).
Anyway, when you really think about it, the height of the bar is completely arbitrary anyway, so why not simply change it?
Enter “rack pulls.” Instead of trying to adapt your body to the lift, adapt the lift to your body by raising the bar an inch or even a foot. Position the bar however high you have to so that you can reach down with a perfect flat back hip hinge and stand up comfortably with the weight.
The goal of the deadlift is to build posterior chain and grip strength, not tweak your back. Rack pulls enable you to do just that.
- Site of pain: Knee
Provocative: Pain during knee-dominant single-leg movements
Replace with: Conventional deadlifts or other hip dominant exercises
More often than not, knee pain during single leg movements comes down to poor technique or strength imbalances. Fixing faulty technique is important, but take a few weeks off and focus on “hip” dominant exercises, like conventional deadlifts, single leg rdl’s, and rdl’s. By avoiding deep loaded flexion movements, you’ll allow the knee time to recuperate, while strengthening the glutes and hamstrings to support the knee in future movements.
Provocative: Step-ups
Replace with: Split squats
Step-ups are a tremendous single-leg knee-dominant exercise. You can go high box or low box, bodyweight for high reps, loaded for low reps, or any combination in between.
The trouble is that not everyone can perform step-ups comfortably. Typically, the reason for the discomfort at the knee is because our joints sometimes prefer to go through an eccentric (lengthening) contraction immediately prior to a concentric (shortening) contraction for increased stability.
An example of that “preferred” sequence is the squat, in which the eccentric lowering phase precedes the concentric phase in which we stand up. In the step-up, the two phases are flip-flopped. Beginning from rest, the knee extends concentrically to raise the body up to the box. The eccentric (lowering) phase follows in order to bring the body back down to floor-level.
A simple workaround for the step-up is the split-squat, which is just like the step-up in that it’s a single-leg knee-dominant exercise, but unlike it in that the concentric phase occurs after the eccentric phase, which helps to stabilize the knee.
- Site of pain: Hip
Provocative: Wide-stance squat and sumo deadlift
Replace with: Different stance width
Wide stance squatting and sumo deadlifting decrease the range of motion needed to complete a lift. In return, this means you can use more weight. Awesome, right?
Not always. We all have different hip anatomy. In some cases, bony blocks cause friction in the hip socket, leading to pinching of the hip. If you have hip pain with squatting or deadlifting, change your technique for the next 3-4 weeks and note improvements.
Provocative: Distance running
Replace with: Rowing ergometer
There’s nothing inherently wrong with distance running. If you love it, more power to you. It requires minimal equipment, you can do it just about anywhere (especially if you can put up with the cold), and training for a 5K is a good way to stay in shape. (Notice I said stay in shape. If you want to get in shape, it’s likely safer to make strength training your primary mode of exercise.)
Of course, running isn’t the cardio solution for everyone, especially for people with hip pain. In fact, the constant pounding on pavement makes it these folks’ worst nightmare. Hardcore runners will try switching up their foot strike pattern to alleviate that pain, but it will inevitably show up somewhere else after the change is made.
A low-impact solution that has witnessed a tremendous surge in popularity of late is the rowing ergometer. Not only does the rower build up the quads, but it’s also an excellent exercise for the muscles of the back and in between the shoulder blades.
To avoid low back pain from rowing, be sure to sit up tall and limit the amount of forward and backward lean at the beginning and end of the stroke, respectively.
- Site of pain: Ankle
Provocative: Walking lunges
Replace with: Split squats
Walking lunges are an excellent exercise for the glutes, hamstrings, quads, and the muscles around the hip jointly called the lateral sub-system. But, if you’re recovering from an ankle sprain or other injury the push-off and deceleration of movement can be more than the joint can handle.
In this case, you will reap most of the single-leg benefits of walking lunges by reducing complexity and doing a stationary lunge, also known as the split squat. In tandem with increasing strength and stability of the joint, split squats will challenge your ability to control pronation and supination through the foot, activating deep stabilizers that may be de-sensitized post-injury.
Provocative: Deep front squats
Replace with: High box step-up and ankle dorsiflexion mobility training
Deep squats are one of the absolute best exercises for the quads, as well as the entire body. However, the anterior placement of the bar necessitates more forward migration of the knees, which can be problematic for people without the range of motion in their ankles for that knee displacement.
The solution? High box step-ups, in which the box height is selected such that the hip crease is below the knee (a la the position of the hip and knee in the deep squat) when one foot is on the box and the other is on the floor.
Although step-ups aren’t for everyone (as discussed above), they are great for people with healthy knees but limited ankle range of motion since they can be performed such that the knee stays behind the toes for the duration of the exercise.
In tandem with the step-up, mobility exercises for increased ankle dorsiflexion should be performed. Although the step-up minimizes the need for them, ankle dorsiflexion is an important joint action to hang onto, as it occurs in the everyday activity of walking. The simplest ankle dorsiflexion mobilization involves pushing the knee over the toes and towards a wall.
- Site of pain: Foot
Provocative: Dorsiflexion and pressure on big toe with Bulgarian split squats
Replace with: Plantar flexion on Bulgarian split squats
Bulgarian split squats are a great exercise, but excessive dorsiflexion on the back foot can cause significant strain on the ligaments and tendons at the big toe joint.
In this case the fix is simple: switch from a “toe up” position with the back foot, to a "toe down" plantar flexed position. By resting the top of the back foot on the bench behind you, you’ll reduce strain on the big toe joint for pain-free single leg training.
Provocative: Standing exercise
Replace with: Golf ball feet and barefoot training
Although shoes are cushiony, supportive, and protective, sometimes they’re actually our worst enemy. In the process of shielding our feet from the elements (a good thing), they also rob us of a lot of sensation (a bad thing). Essentially, shoes limit the amount of information we’re able to receive from the floor beneath us, which then allows the muscles of our feet to be lazy.
Now, I’m not advocating for going out and running three miles in bare feet. That sudden increase in ground contacts would be far too great. But if you’re someone who has pain underneath your foot when standing, simply training with your shoes off will strengthen the intrinsic muscles of your feet, which could help ease that pain.
Prior to training barefoot, roll a golf ball under your feet for a minute per side. Not only does the golf ball feel great, but the pressure will “wake up” those dormant muscles of the foot, which will improve foot function as you go to lift heavy things later on in the workout.
About the Guest Author
 Eric Bach, CSCS, is a strength coach based in Denver, Colorado, where he helps pros improve their game and Joe's look better naked through high-performance coaching. Be sure to check out Eric's free e-book on his blog. Beyond fitness, Eric loves football, hanging with his wife and his dog/assistant, Rocky Balboa, and drinking copious amounts of espresso.